Crispy Outside, Fluffy Inside: The Waffles You’ll Ever Need
super easy
No-sugar twist on a family breakfast favorite.
There’s something about waffles that feels like a weekend celebration, even if you’re making them on a Tuesday morning with a toddler tugging at your leg. I grew up thinking waffles were a treat reserved for diners or lazy Sunday brunches, but once I figured out how simple (and surprisingly healthy) they can be, they became a go-to in my kitchen.
These waffles are special: no sugar added, naturally protein-packed, and still as golden, crispy, and fluffy as the ones you’d find stacked high at a café. I make them for my daughter when she’s craving something cozy, and honestly, they’ve saved me on mornings when I need quick fuel but still want food that feels like a hug.
Today, I’m walking you through how to whip up these homemade waffles — no fancy tricks, just a handful of pantry staples, a hot waffle iron, and a few tips to make them come out perfect every single time.
The Ingredients (Makes 6 waffles)
1 cup oat flour (or rolled oats blitzed in a blender)
½ cup almond flour (adds richness + protein)
2 scoops vanilla protein powder (whey or plant-based)
1 tsp baking powder
½ tsp cinnamon
Pinch of salt
2 large eggs
1 cup milk of choice (almond, oat, or regular)
1 tbsp melted coconut oil or butter
1 tsp vanilla extract
Optional but recommended: Fresh berries, Greek yogurt, nut butter drizzle, or toasted coconut for topping.
Step-by-Step (with sensory cues + casual kitchen talk)
Step 1: Mix the dry team.
Go in with your oat flour, almond flour, protein powder, baking powder, cinnamon, and a little pinch of salt. Give it a whisk until it looks soft and blended — you’ll notice the almond flour makes it look a bit sandy, and that’s what will give the waffles that tender inside.
Step 2: Bring in the wet team.
In a separate bowl, crack in two eggs, pour in the milk, add your melted coconut oil (smells amazing already, right?), and vanilla extract. Get this all combined until smooth and glossy.
Step 3: Marry the two.
Now, go in with your wet mix, slowly, into the dry. Don’t rush this — we’re folding, not overbeating. The batter should be pourable but not runny, like thick pancake batter. If it feels too heavy, loosen with a splash more milk.
Step 4: Heat your waffle iron.
This is where the magic happens. You want it nice and hot before the batter touches it — that’s how you get the golden, crispy edges. Lightly grease with coconut oil or butter (a quick swipe with a brush works wonders).
Step 5: Pour and wait.
Scoop in about ½ cup of batter. Close the lid and don’t peek (I know, it’s tempting). Let the iron do its job until the steam slows down — that’s your visual cue that it’s ready.
Step 6: The reveal.
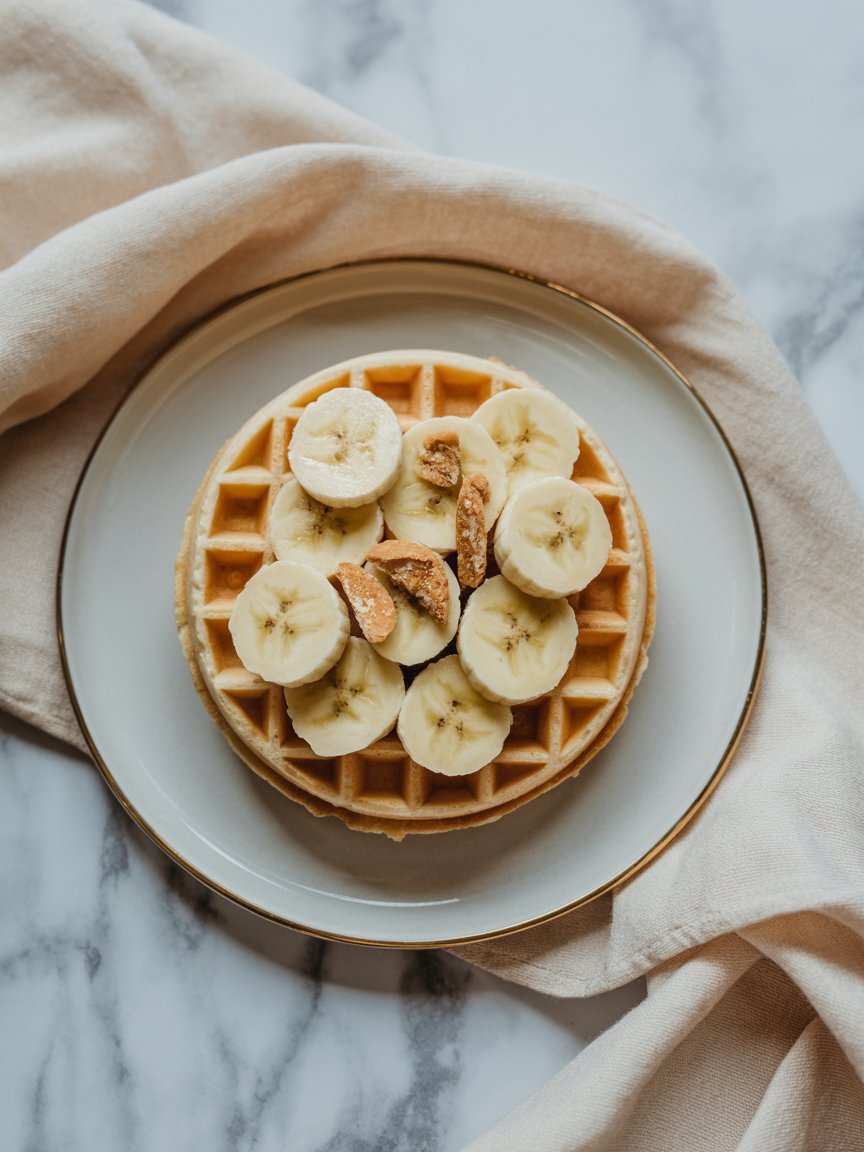
Lift the lid and get this: waffles that are golden on the outside, fluffy inside, and smell like a cozy café morning. Give them a second to rest on a wire rack (this keeps them crispy instead of steaming soft).
Sensory Finish
When you break one open, you’ll see the tender crumb and smell the nuttiness of the oat and almond flour. Pile them high, go in with Greek yogurt, fresh berries, maybe a drizzle of almond butter. I love adding toasted coconut on top — it crackles against the soft waffle like magic.
Helpful Tips + Serving Ideas
Batch it: Double the recipe and freeze leftovers. Pop them in the toaster and they crisp right back up.
Toddler trick: Cut into strips and serve with a little fruit purée for dipping.
Protein boost: Add chia seeds or hemp hearts right into the batter.
Dessert hack: Top with dark chocolate drizzle and strawberries for a guilt-free sweet.
These waffles aren’t just breakfast — they’re an all-day kind of thing. And the best part? You know exactly what’s in them, no mystery ingredients, no sugar crash. Just golden, cozy, feel-good food.


Laisser un commentaire